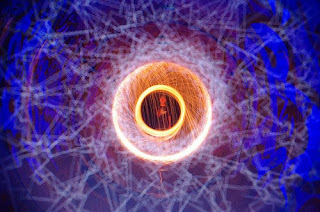
So you want to know how to make the crazy pixelated spirographs? It's super easy.
You will need a computer. Download Poly 1.1 It is a software that lets you manipulate shapes and then spin them. Once you have it installed, make sure to go the Preferences and check all the view modes.
The LCD monitor on my desktop works much nicer than the one on my laptop. My laptop screen is reflective and is just awful at producing "black". It seems to work better when going into the ultra contrast mode by pressing Alt+Shift+Print Screen (the beep it makes is very appealing). I also made a black paper mask to put over the whole laptop to kill any spill light from the windows and keys.
My laptop screen still wasn't cutting it, so I tried to go macro with it. I put on the Raynox macro converter and could focus much closer to the screen. This works much better as far as killing the glare, but it also makes focusing and keeping it still more difficult.
I feel like I'm cheating by making these shapes on a computer and then just taking a photo of the computer. I guess if it's all one exposure it's still better than using Photoshop. It was fun having my laptop in a tunnel, and I plan on doing it more.
Saturday, August 28, 2010
Thursday, August 19, 2010
Focus Shifting
This is pretty self explanatory, yet I will try to make it more difficult than it is:
Because focusing determines the "focus" of the image, it is critical to get it right. But when doing so, there can be desired areas that are left out of it.
Here is how you can get around it:
1. Focus on your subject, light the subject
2. Shift the focus to your background/foreground/other subject, and light that too
The hard part is adjusting the lens to where it needs to be. Take note of the distance labels on the focusing ring, and remember them.
Using the same technique, you can make a part of the image completely out of focus. Just spin that focusing ring!
Moving the Composition
Sometimes I wish I brought 5 more tripods with me. Why you ask?
Because I'm crazy!
No, but really you can make some cool photos by layering your compositions.
What does that mean? Taking multiple, different exposures in 1 long one.
You can do it with only one tripod too! How is it done?
1. Find your original composition.
2. Find another one (and another, and another..) You can change the lens to get different effects.
3. Test the lighting and focus for each composition individually.
4. Put them all together! Often it's best to cover the lens or put it to f22 while you're moving the camera to avoid unwanted exposures.
You can even get cool results by keeping the tripod legs in the same place. By pivoting and/or rotating the camera, you get totally different looking pictures (location dependent). This allows you to easily get back to that first, original composition. I am still experimenting with this, and it seems just subtle aspects of each layer is key.
Using this trick, you can put the sky on the ground and the sea in the air in the same photo!
Aperture Switching
Ever get frustrated because your cathodes need to be shot at f8, but your orb needs to be shot at f4? Ahhhh!
Here is a trick I use all the time now. Using a manual lens, you can change the aperture during the exposure!
Because the light sources you are combining are different, they require different camera settings.
How do you do it?
Simple! Here is an example using the cathodes and orb:
1. Starting with the orb, so the aperture is set at f4. Make the orb.
2. Go back to the camera, and rotate the aperture ring to f8.
3. Swing the cathode around. End the exposure.
Now you've correctly exposed both the orb and the cathode! Wasn't that easy? Don't forget to set it back to f4 if you're going to try again (I never get it right the first time). It helps to know the lens well. With my lens, when I'm at f2.8, three clicks goes to f5.6. Two more clicks goes to f8, two more to f11, and three more to f22. It works.
Do it!
Cover the Lens!
Completely covering the lens during the exposure will prevent unwanted light from making it into the camera.
This is a very useful trick for a number of reasons:
1. It allows you to use a light so that you can physically see and move to a desired area.
2. It lets you use tools that have a cumbersome switch.
3. Essentially it is not exposing, so you can take your time to prepare the next trick (eg: can prevent the sky from blowing out).
This is most effective when another person is standing at the camera ready to cover the lens.
An easy way to do it is to put the lens cap on. I would still avoid pointing any light at the camera because lens caps are not light tight.
I have also just used my hand to cover the lens. Also, moving your hand over the lens in a pattern can create interesting effects when shooting a moving light source.
Another option is to put a dark cloth over it - a t-shirt works.
Try it out!
To Photoshop or not to photoshop..
Post processing is crucial to achieve a desired effect in many photographing styles.
Light painting is not one of them!
Because you are essentially working with a black canvas, nearly every traditional photoshop/darkroom technique can be done during the exposure. Dodge/burn, rotation, cropping, layers, blur, vignetting, color/white balance, exposure, and sharpness can all be easily achieved without your computer. Ambient light often will limit or prevent techniques, but you need to learn to use what you've got. An interesting thing about light painting is that there is usually already a lot of contrast. No need to adjust levels, curves, contrast, or saturation!
Creating the image straight out of the camera (sooc) should be something you always set out to achieve. After all, it is light painting - not a digital manipulation. Spend more time in the camera and no time at the computer!
Envisioning the Scene
The process of visualizing the photo can be just as fun as taking it. This is the first thing I do on my way and when I arrive to a location. Usually I am not working on a preconceived idea, so I make it up as I go. There are many factors to consider before you start shooting, and recognizing them is something you learn with time and mistakes.
Here are some questions I may ask myself about a location:
1. Is it dark enough?
Take note of any ambient light that may interfere with your image. What is the maximum exposure I can take before it becomes over exposed? Some light tools are bright enough to use in light polluted areas while others are not. Streetlights, buildings, cars, the moon, sun, reflections, and lots of other things can ruin a great composition. Of course, you can also use the ambient to your advantage. ----->
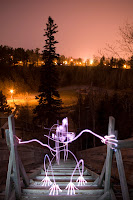
2. Is it safe?
Before I whip out all my investments, I like to be sure that it's alright to do so. Be aware of such dangers as snakes(they attack to kill), poison ivy, hobos, gangsters, rain, floods, cliffs, moisture, and anything else that will hamper your ability to think creatively or mess up your equipment.
3. Where should I set up?
I like to take the time to relax when I arrive. This allows me to become familiar with all the aspects of the area. Walk around and search for the best composition. Take some quick flash photos. Compare your options and make a decision.
4. What should I do?
So, now you have your camera on the tripod all ready to go. Now what? Your composition and bag of tricks will decide what happens. I like to step back and relax again at this point (I'm lazy). Look at your scene and imagine what could happen there. How does it make you feel? What brought you to this place? How do you belong there? Is this a good spot for a light creature or better suited for a woolspin? Be versatile enough to make the most out of it. If you can't come up with anything striking, just start doing something random. This almost always leads to new ideas. If still the area isn't working out, try some techniques that aren't dependent on the scene. Plenty of different, interesting photos can be taken anywhere it is dark. Have fun with it!
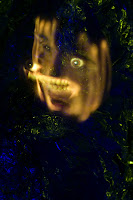
That's basically my thought process for flicking places I've never been to before. The energy of the unknown is something to seek. Allow your images to happen in a natural sequence.
Hi!
I made this site to outline some of the light painting techniques I have learned, and to document some of my photo missions.
Subscribe to:
Posts (Atom)